
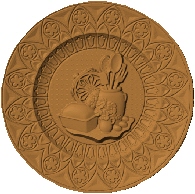
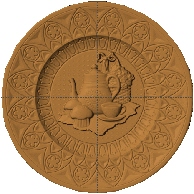
Thank you very much for the plates - I look forward to carving them - I used parts of your design and made a platter to hang between them - on my kitchen wall... hope you don't mind.......

MPC http://www.mediafire.com/?e2tm0wr2mom


 Senior Member
Thank you very much for the plates - I look forward to carving them - I used parts of your design and made a platter to hang between them - on my kitchen wall... hope you don't mind.......
MPC http://www.mediafire.com/?e2tm0wr2mom
Last edited by LittleRedWoodshop; 09-23-2009 at 11:54 PM.
 In Memoriam
Don't mention it... I love the inovation (would you share that file with me?)
I want to make these for my home as well and maybe my mother for Christmas....
Senior Member
is right below the plates - just click on it and it will download
 Junior Member
Klinger,
Now I understand what you were asking... I did it just like I said... I stained the board with the Ebony stain.
CarveWright does not like dark wood... but here's what you do... The machine always checks the edges (Width and Length).
Work around: Run masking tape down the lenght of the board in the center. Run masking tape across the width of the board in two places. 1. 3.5" from the end of the board. 2. Directly under the bit. The wider the tape the better.
Because I used Centerline for the text, and routed the edges, the rest of the board remains the same.... The Pine stain only stains the carved areas... Depending on how much of the Ebony stain was left on the board, the pine stain may have little or on effect in the remaining Ebony stained area.
I hope this is what you were asking about....
Last edited by Dirtydan; 09-24-2009 at 01:35 PM.
Dirtydan
A.K.A. The Gunny
Every day I thank God for Mister Levi Strauss
mailto:gunny@thegunnys.us
http://www.thegunnys.us
 In Memoriam
Those Plates Are Just Amazing.i Love How You Paint It. Very Impressive.
Thanks
Ajk & Hilda
In Memoriam
Thank you for the platter. And thanks for the compliments....
Junior Member
Rob, thanks, I'm glad you like the sign and thanks for the really cool plates. My wife says thanks too.Originally Posted by robbrigg2

Good idea, Jason. Thanks for the platter. My wife is going to keep me busy on these <grin>.
Bill....
Junior Member
Hope this helps....
1. Enter the text you want on the board. Raster Mode only.
1a. Set Depth to 0.100
1b. Set Height to 999 (This sets the top surface of the letters at the top of the board)
1c. Click on the Draft Button and set it to Medium
2. Select the Box or Oval tool and outline the text with the selected tool
2a. With the outlined area selected, click on the Carve Region Button
2b. Change the depth setting to 0.100 (This lowers the surrounding area to the base of the letters... (Carved out area - for contrasting stain)
See attached Pic and File...
Dirtydan
A.K.A. The Gunny
Every day I thank God for Mister Levi Strauss
mailto:gunny@thegunnys.us
http://www.thegunnys.us
 In Memoriam
Well Autumn's here, -- Made up a Plaque for the Grand Kids to color or paint in line with the season.
Last edited by Kenm810; 09-28-2009 at 01:10 PM.
Ken
Ver 1.182 on XL Pro plus Ver 1.164 and 1.175 on Windows 7 Ultimate
It Never Fails * Till * You Say It Never Fails
Junior Member
Great Idea Ken....
Dirtydan
A.K.A. The Gunny
Every day I thank God for Mister Levi Strauss
mailto:gunny@thegunnys.us
http://www.thegunnys.us
 Posting Permissions

 Reply With Quote