
Here you go. Let us know what you learn.


 Senior Member
Here you go. Let us know what you learn.
Senior Member
I did the quick model while I was waiting for my carve to finish.
I frustrate myself a lot sometimes. Guess what I just carved. Carved them out of a beautiful chunk of cherry. The carvings came out great. Now can everyone see how I royally messed up. lol
I am going to turn on some soothing music and have a nice adult beverage.

Junior Member
Awesome!
Looks like it will work with some tweaking.
I still have to review the tutorial, but I kind of figured out how to get this thing into the rotary project.
I need to make the center axis thingy bigger.

Designer 1.187 Build 10870
Designer 3.106 Build 38
Pattern Editor
Centerline
Conforming Vectors
2D Vector Drawing Suite
STL Importer
3D Pattern Modeling Suite
Rotary Jig
Junior Member
Thanks for those STL models. They look great.
I have the 3D package, but haven't really used it. I'm used to ArtCAM and Aspire products.
Can you give me a quick rundown of how you achieved these models?
Designer 1.187 Build 10870
Designer 3.106 Build 38
Pattern Editor
Centerline
Conforming Vectors
2D Vector Drawing Suite
STL Importer
3D Pattern Modeling Suite
Rotary Jig
Senior Member
lol. I used metaball modeling to make the base mesh and then digital sculpting to tweak the shape.
You have nurb modeling (CAD), poly modeling (polygonal modeling of 3d art software) and you have the granddaddy metaball modeling which was created in the early 1980's for Carl Sagan's Cosmo series.
 Senior Member - Moderator
Used the same side? Glad to see you and Jim working this out.. I pointed him to you as a possible source for making the bird STLOriginally Posted by oscarl48

RingNeckBlues
My patterns on the Depot
DC-INSERT It Just Sucks!
Proven to out perform all others!
Buy CarveWright
Colorado FaceBook Users Group
All patterns and projects that I share on the CarveWright forum are for your personal carving purpose. They are not to be shared, sold or posted on any other web site without permission from RingNeckBlues Designs.
Senior Member
I sure did. Newbie mistake from an old guy.
Junior Member
I can get the model into the rotary file, and I can adjust the depth and percentage, but I can't seem to resize the width of the pattern to fit the 2" diameter. It's stuck on the 4-1/4" diameter width @13.359".
I can't type in a new number and have it stick, nor can I drag the yellow handle back to the edge of the unwrapped model on the left.
Any idea on how to get it "unstuck"?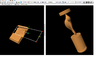
Designer 1.187 Build 10870
Designer 3.106 Build 38
Pattern Editor
Centerline
Conforming Vectors
2D Vector Drawing Suite
STL Importer
3D Pattern Modeling Suite
Rotary Jig
Senior Member
Don't have any rotary experience but when I see the yellow number it means I've got a 'locked' dimension. Right click on the yellow number and at the top select ' remove attachment' which hopefully will allow you to change the number. Hope this helps.
Senior Member
test carved the model. Really happy with the pattern. Hard maple and mahogany. Using up some hardwood scraps.
 Posting Permissions

 Reply With Quote