
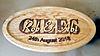
Here is one I did a while ago:Originally Posted by Deolman


 Senior Member
Here is one I did a while ago:
Junior Member
WOW! That looks great! I really love how you two-toned the top names. I have so much learning to do to become that accurate with my lettering heights, etc.
Edit: DickB, is there any way you'd be willing to post the file for that to help me learn the technique better?
-Don
 Member
DickB
That is an outstanding piece of work!!! Great choice of fonts and exquisite carving depths. Thanks for sharing!
Senior Member
OK. I used Designer 3 for this project. The prep file is of course run first to make space for the layered wood. I used 1/8" thick material from Rockler, so the prep area is 1/4" deep.
Next I glued some black walnut.
And then some hickory.
I use a sled whenever I can. There are a few good reasons for this. It saves material, deals with warped boards, keeps the cutting bits away from the brass roller, and dampens vibration which can cause the X encoder to become unreliable. My sleds have 4" end caps and 1" side rails on 3/4" plywood base.
So in Designer I draw a rectangle to represent the project board on the sled, say No to stay under rollers, and Place On Corner. Note that the actual sled is bigger than the virtual one, but by placing on corner and loading the project board in the corner of the sled, it positions the project on the project board properly. This also minimises board (sled) measurement time.
In the project itself, I set the depth of the oval slightly deeper than 1/4", .32", to ensure that all of the unwanted black walnut is carved away. The depth of the last name is set to .25 and the height adjusted so that the top of the letters are again slightly deeper than the hickory, at .138". Just entered a number in the Height box, then place your cursor over the letter to read the depth at the bottom left of your Designer window. Change the Height number to get the desired depth. In this case it was 90. Set the height of the first names to 999.
I drew areas for the prep board on the final project virtual board, but did not assign a carve region. I saved the project, then save it again naming it prep to make a copy. I deleted everything except the prep areas, then assigned them a carve region. This ensured that the prep area aligns perfectly. Make sure that you load your board with the same orientation after the prep is done!
Senior Member
Thanks! And, it's much easier to finish than painting the letters, which I suck at.
 Senior Member
Nice to see this being done, here is a link to one I did three about years ago https://forum.carvewright.com/showth...193#post260193 - perhaps my last project. I like Dick's glossy one, I did a mat finish on the one I linked.
Ken,
V-1, 2, & 3
When the People fear their Government, there is Tyranny.
When the Government fears the People, there is Liberty.
- Thomas Jefferson
You must be the change you wish to see in the world.
- Mohandas Gandhi
Member
DickB
Thanks for sharing the photos and details of the process. Very helpful! Have been planning on doing such a project for some time. Highly motivated now!!!
Senior Member
After seeing the final product it was obvious the layering was the way to go. Started on some Xmas gifts early, attached are 2 of 8 completed recently. One is oak background the other is sycamore. Both are redwood second layer and poplar top layer. Been using up a lot of pieces. Cut the layers from some 2x6 redwood and the same of poplar and planed down to the 1/8 inch. Really love the result( and not staining/painting).
Thanks to the original submitters
Rick H
 Senior Member
Beautiful pieces and a great technique.
 Junior Member
Im getting excited about using my Carvewright again!! Thanks for the inspiration guys!!
Sent from my iPhone using Tapatalk
 Posting Permissions

 Reply With Quote