Flip cut refers to which side of the outline you want the Cut Path tool to follow. You can choose or change this in the Cut Path dialog box:

In your original project file the cut path was on the inside of the outline, cutting away 1/8" of your carving:
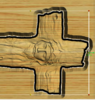
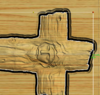
To preserve the carving you want the cut path to be outside of the outline:
No. I've rearranged the project so that all machining is done from the front of the board only.
The original project was not set up well to answer either way. And I did not focus on that in my modified project. So I'm posting new versions to minimize board waste.
This business of stay under rollers can be confusing to new users - it certainly was to me. How to answer the machine's question depends upon how the project was laid out on the virtual board.
We always want the machine to stay under the rollers, no matter how we answer the question. Since the actual machined area for this project is about 17" long, you are going to need about a 24" long board in any case.
Lets start with project
Cross stay under rollers.

I have laid this out on the smallest possible standard-size virtual board. Notice that there is about 1" wasted top and bottom. This (on the bottom) is necessary to keep the cutting bit away from the brass roller. You might be tempted to go from a standard 8" board (7.5" actual) to a 6" board (5.5" actual), but that would put the cutting bit close to the brass roller. This can introduce vibration and cutting errors. For this project, you would want to answer "yes" to
Stay Under Rollers? In this case the machine will then add 3.5" to the length of the project on either end, to have enough board length to stay under rollers.
Now look at project
Cross not under rollers.

In this case I have selected a longer virtual board, and I've placed carvings and cutouts at least 3.5" away from the ends of the board. In this case I would answer "no" to
Stay under rollers?, so the machine doesn't add yet another 7" to my board length, but in fact
the board will stay under the rollers.
You will load the cutting bit, then the carving bit before any machining takes place. After carving you will load the cutting bit. Just follow the prompts.
I would strongly recommend that you use a sled for this project, to save on material and to avoid possible vibration-induced cutting errors, but that's a whole other discussion.


 Reply With Quote


