Page 1 of 5 123 ... LastLast
Results 1 to 10 of 66

Thread: my improved sled

Hybrid View

Previous Post Previous Post   Next Post Next Post
  1. #1
    Join Date
    Aug 2009
    Location
    Whidbey Island, WA
    Posts
    2,250

    Default my improved sled

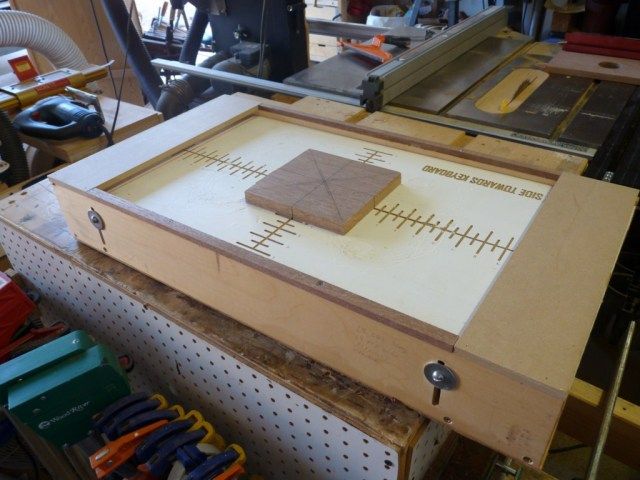
    After quite a bit of reading and comments lately on the subject of sleds, I thought I'd show y'all mine. I've made some recent improvements. A couple of you will be happy to hear that my sled requires no masking tape for the sensors now! I know I've been promising I'd post pics about this for a while now but I wanted to get my improvements done before I showed it. I do plan to make another that is less "robust" as I over-engineered this one a bit. With the new "four-inch" stretchers on the ends, I shoudn't have to worry about racking and could make the whole assembly much lighter without comprimising strength.


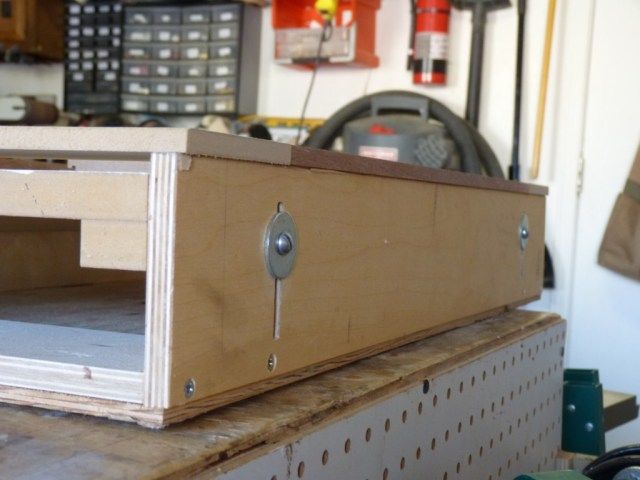
    The sled is basically a long "U" shape that has an inner "floor" that can be raised and lowered to accommodate different thicknesses of materials. The "floor" rides on 4 bolts which can all be loosened and then tightened to the correct material thickness. To do so, I loosen all four and then hold the material up to each corner and tighten the bolt appropriately.


    This pic shows the grooves for the bolts.


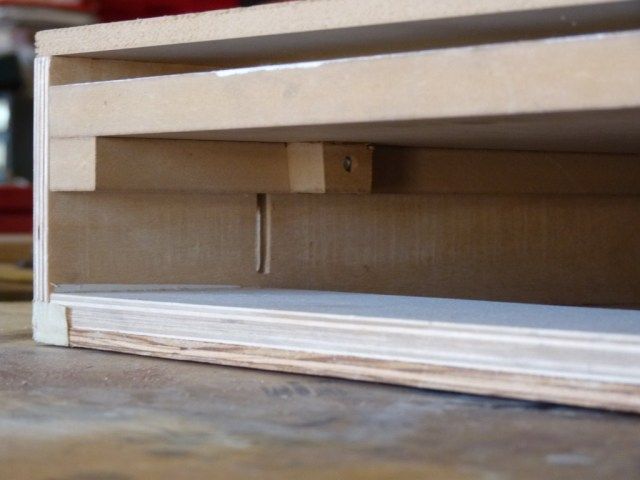
    This shows the inside- the lower "square" holds the nut that the carriage bolt tightens into. I'll use threaded taps on my next version but I will say that the extra thickness does keep the piece from racking too much.


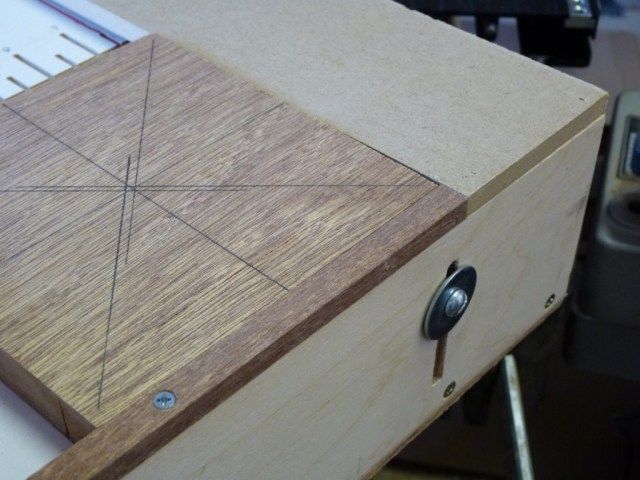
    To use the sled I put the piece to be carved into the center with double stick tape (It hasn't failed me yet... very tough stuff as I use the kind woodturners use) I carved marks showing the center of the sled with my CW-- this makes lining up the piece in the center very easy. I then put the sled all the way to the right with the left side "four-inch rail" under the sensor. I then just use the sled as normal, ensuring I use "center" for everything. Perhaps there is a better way to do all this, but it works for me and there is no loss of material.

    Let me know if you have questions,
    Lawrence
    Last edited by lawrence; 10-02-2012 at 08:33 AM.

  2. #2
    Join Date
    Nov 2007
    Location
    Las Vegas NV
    Posts
    1,267

    Default

    As usual Lawrence you have hit a home run. Great sled.
    Leo Davenport
    Enjoy Life Carve Something everyday

  3. #3
    Join Date
    Mar 2012
    Location
    Southgate, Mi
    Posts
    1,317

    Default

    It looks like it all can be built by the carvewright. I am so disappointed that there are no carvings on it! Carvewright Logo on the side or something! A masterpiece like that needs to be dressed up. With a sacrificial board that sled could be the last sled we have to build. Drop a new piece of luan in, carve the ruler, and ready to go! That is an awesome project.

  4. #4
    Join Date
    Sep 2009
    Location
    Goodman, Missouri
    Posts
    2,922

    Default

    Lowes has 2 sided carpet tape that works great. I use the one with the fiber, not the plain 2 sided like scotts tape.
    Using Designer 1.187, STL importer, Center line, conforming vectors, scanning probe/PE, and the ROCK chuck.

    Eddie


  5. #5
    Join Date
    Jul 2010
    Location
    Central Virginia
    Posts
    180

    Default

    I have a sled similar to this and i plan to rebuild some of it, The "u" box seems like it can be made from 1/2" Baltic birch as opposed to 3/4. This will significantly reduce the weight and if you use the jog to touch then you dont have to worry about the bit missing the rails on the side when measuring.
    Stephen Allen
    Patterns By Stephen
    Pattern Super Store

  6. #6
    Join Date
    Aug 2009
    Location
    Whidbey Island, WA
    Posts
    2,250

    Default

    Thanks guys- Hope I can answer a couple of questions / clear things up here

    1. There isn't really a "plan" for this... sorry... I really winged it as I went along and have added/adjusted it. I do hope to make a sled in the future that will be made of thinner, lighter materials and that will not be so over-engineered. If I can make it so that this sled can fit *broken down into a flat rate "game" box, I *may put it up for sale after I test it.

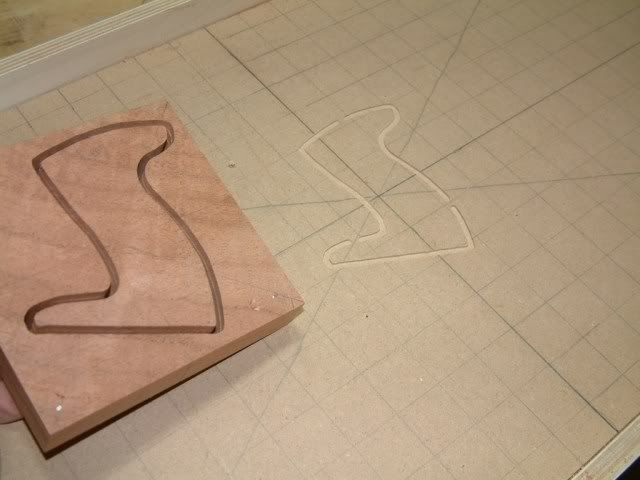
    2. Cut outs work- and yes it scars up the face like here. I just filled it with wall paste and painted over it... worked just fine A replicable face would be preferable though.


    I used this sled in my "ornament" video last year
    http://www.youtube.com/watch?v=8s81Q...7&feature=plcp
    this was before I put on the end plates, and some tape was required... I know better now

    I REALLY recommend turners tape- I get mine here. Yes, it is pricy... but it lasts a VERY long time as you only need to use a little bit (a very little bit) as it is a pressure sensitive adhesive. It goes on strong and holds even stronger after going under the CW rollers.

    http://www.woodcraft.com/product/200...-x-36-yds.aspx

    Steve, I'm not sure how to answer your question... I just use "center" and it works. For design, I just program the piece onto a board the actual size of the board I put on the sled... sometimes I get a *hair off on my centering, but I clean this up afterwards. I think there would be a way to put it on the corner, but I haven't sussed that out yet... I'm pretty dumb (and stubborn) sometimes.

    Chay- it is 14x26ishx4ish.. but I think this is actually too big. My next one will be smaller.

    Thanks again all, and please (of course) feel free to copy and improve on (as long as you share your experiences!), this idea.

    Lawrence

  7. #7
    Join Date
    Jan 2008
    Location
    As of 6/2021 Punta Gorda, Florida
    Posts
    1,461

    Default

    Lawrence... that is a nice looking sled and practical too. That would certainly eliminate having to have so many sleds. I'll have to keep your sled in mind when I do my next one.

  8. #8
    Join Date
    Sep 2007
    Location
    Northern Colorado
    Posts
    7,962

    Default

    Lawrence,

    Thanks for getting this posted for us! Great job!
    RingNeckBlues
    My patterns on the Depot
    DC-INSERT It Just Sucks!

    Proven to out perform all others!
    Buy CarveWright
    Colorado FaceBook Users Group


    All patterns and projects that I share on the CarveWright forum are for your personal carving purpose. They are not to be shared, sold or posted on any other web site without permission from RingNeckBlues Designs.

  9. #9
    Join Date
    May 2009
    Location
    NL Canada
    Posts
    49

    Default

    Thats a great looking sled. I hope you don't mine me making one like it.
    I guess I coulds use a frame on the bottom instead of solid plywood.
    Whay size did you make it?
    Best regards.
    Chay

  10. #10
    Join Date
    Sep 2008
    Location
    Nuevo, CA
    Posts
    1,854

    Default

    Amazing and eliminates having to plane 25/32 boards to 3/4 to match my sleds. Only shortcoming I see is that cutouts could be a problem, but that needs investigation. It's been a while since I did a cutout on a wide board, but I think the actual measuring is bypassed and your are just asked for the thickness. If that is correct, then cutouts will work, but may scar the surface - or use sacrificial 1/8" mdf under the piece. Where do you get your 2 sided tape? I am having trouble finding it.
    Thanks
    Clint
    CarveWright StartU team member
    Web Site WWW.clintscustomcarving.com

Page 1 of 5 123 ... LastLast

Posting Permissions

  • You may not post new threads
  • You may not post replies
  • You may not post attachments
  • You may not edit your posts
  •