


Looking for ideas on what is causing and how to solve (or prevent on future sign) wood cracking problem.
My daughter had a friend that needed a sign, you know how it goes: "Oh, my mom/dad can do that for you!"
My first advice to them was to use a local sign maker that would also install it professionally. No, they really wanted me to do it, 4 1/2' X 4' and carved on both sides.
I started with 2" hemlock and planed it down to 1 inch; carved both sides of each board; biscuit joined and glued the boards; glued and screwed a 2 edge on all sides, front and back. My theory was the longer top and bottom edge would act as a brace. They extended out to reach the 6' posts and would allow the wind to pass around and offer some flexibility. The paint is latex based enamel except for the gold detail.
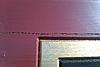
The original sign is seen in photo one with the proud wine master. Photo two shows the new, closer posts with the sign mounted directly on them, braces removed. If you zoom in real close you may be able to see some cracks on the top right corner in the gold border of the logo and from the left edge through the words Tasting near the bottom. This started within two months. A couple weeks ago a new crack appeared as shown in photo three. The cracks appear suddenly and go clear through the board, enough to see light through to the other side.
The only other possible contributing factor may be that the sign resides about 400 miles from where it was made. I was very proud of this sign and am not at all happy with the way it is cracking. Someone out there is going to have a suggestion. This cannot be a singular problem. Any thoughts would be welcomed.
Thank you in advance.
Gramma Pam

 Reply With Quote


 Sometimes I'm just totally underwhelmed!


