Results 1 to 10 of 48

Thread: Pistol Grips?

Threaded View

Previous Post Previous Post   Next Post Next Post
  1. #19
    Join Date
    Feb 2008
    Location
    Indian Lake, Ohio - Rts 33 & 235
    Posts
    3,967

    Default 2 sided grips

    Quote Originally Posted by Burl Source View Post
    Now there are a couple more things I need to figure out. I will be reading through the software manual and tips to see if I can find a solution. If anyone would like to give advice or any directions please make a post. I really appreciate the help.

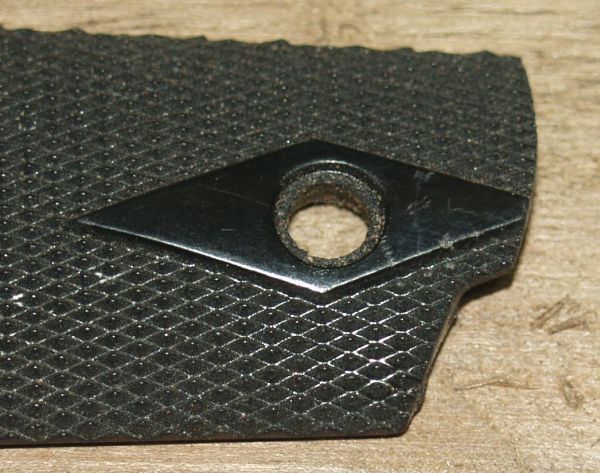
    #1 How to make countersunk holes for the screws. Looking at the takeoff grips I have it looks like the largest hole matches the carved pattern. Measuring from the outer surface about 1/16" down the hole needs to be smaller by just over 1/16". I am assuming this is to hold the head of the mounting screws.


    #2 The backsides of the grips will need to be grooved for the safety and ? The grip to the left looks to be about 1/8" deep and the one on right about 1/16". I need to figure out how to carve these out of the backside and how to do a cut path to cut each grip out of the board. In summary; how to set up the project to do the carving on the backs and then be able to flip the board to carve the fronts and then cut out the grips utilizing tabs. I hope I am making sense here.


    Once again, any help, advice or encouragement is greatly appreciated. I'm not dumb, .... but maybe a slow learner. I just started experimenting with the machine a couple days ago. You guys are helping to speed up the learning process immensely. Thank You.
    Since you have the pattern for the front, (I'll bet you can use your scan) I would try this:
    A) Place small drill holes on the front (Temporary reference) where the screws go.
    B) Outline your pattern and apply your Cut-Path (The cut-path applies tabs, you just do not see them in designer).
    With the above in place,
    C) open the back design.
    D) Apply the proper drill holes.
    E) Apply/design your pockets/grooves Avoid Raster carves, if you can. It may depend upon the bits you have on hand.
    F) If your holes are "Countersunk", on the back, you will need to determine if you need a "V" bit, Bull Nose, or Flat bit, to attain the proper contour. Depending on your choice, you may be applying a Drill or Vector function.
    G) Last, go back to the Front and remove your temporary drill holes.

    Just translate what you would do, if you were carving them by hand.
    AskBud
    Last edited by AskBud; 12-24-2010 at 04:11 PM.
    AskBud Downloads =>> CLICK HERE
    Lesson added
    7/15/2012 Titles begin with "2D-3D Build a Pattern-Part-3"

    CW Vacuum Head Project =>> CLICK HERE
    AskBud Home Page =>> CLICK HERE <<=PC lessons or CW lessons

    More than 1250 AskBud patterns
    vvv-CLICK BELOW-vvv
    http://store.carvewright.com/manufac...ufacturerid=29

Posting Permissions

  • You may not post new threads
  • You may not post replies
  • You may not post attachments
  • You may not edit your posts
  •