Page 2 of 3 FirstFirst 123 LastLast
Results 11 to 20 of 27

Thread: first lithophane .. uh... lithopane? lithophains... first pretty lightbox!

  1. #11
    Join Date
    Aug 2009
    Location
    Whidbey Island, WA
    Posts
    2,250

    Default

    Well... I'll break out my thinking out loud (out typed...)

    The corian cost me $91.50 (including shipping) for 20 pieces of 8 x 10... so figure $5 for corian + $5 for shop misc. (cost to run the AC in my shop/cost for the machine consumables/shop electricity/paint/chisel sharpening/gas for the stove etc)

    My design is set... took me all of about 5 minutes to do considering I've already been paid for making the centerline patch/airplane pic... still... figure 15 mins design for each one including name design/upload time - that's another 5 bucks unless someone wants a custom picture. I'd plan on another 15 mins to 30 mins for custom work.

    The carve itself took 1 hr 44 mins on best setting... if you include 16 mins for setup/cleanup that's 2 hrs... that's another 40 bucks... I may try to cut down this time by using less than a best setting or less than the highest feather.

    Painting was quick and easy as was the scraping... 30 mins tops... $10
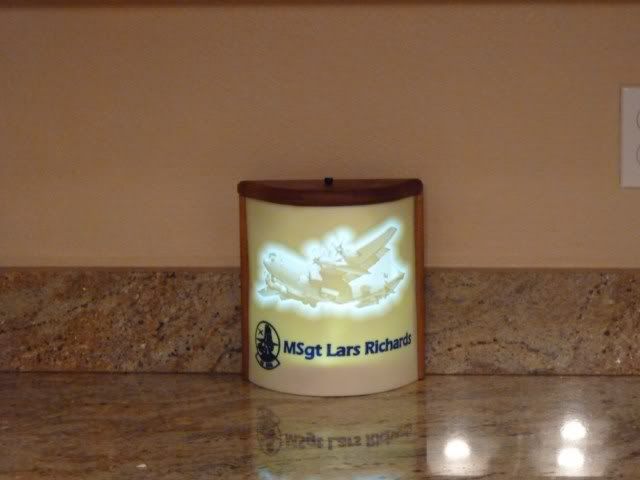
    The bending took 15 mins- $5

    Going by this formula- I'd be at $70-80 for a simple bent litho before lightbox... no bending would be $65-75... and If I can cut down the carve time I could see getting 8x10s done in batches down to around $50- especially if I pre-carve the airplanes and just have to carve the names when orders are paid for... this makes them easier to make at short/no notice which is a very valuable thing here on the base where there are constant "oh my gosh we didn't buy the Major anything for his going-away" panics. "Rush jobs" usually get a premium of $10-$20 (for picture frames I do) The lightbox/bending would certainly also add on hours/cost

    This is how I do many cost estimates for my commissions... I used to low-ball the final cost, but now I've taken to playing it straight/rounding up and find I am better able to absorb any "oopsies" and am better compensated for when a project (as it always does) takes longer than planned.

    Hope this helps,
    Lawrence

  2. #12
    Join Date
    Sep 2009
    Location
    Goodman, Missouri
    Posts
    2,922

    Default

    Lawrence great work, like the design and the bending.
    Using Designer 1.187, STL importer, Center line, conforming vectors, scanning probe/PE, and the ROCK chuck.

    Eddie


  3. #13
    Join Date
    Nov 2007
    Location
    Aurora, Illinois
    Posts
    803

    Default

    Great job! Please show the lighted version when you finish it.
    Thanks Lee
    Pop's Fix It Shop, We won't make it any worse.. Using "A" machines 1.187 1.188 ,2.007, 3.103
    2 Machines no waiting.

  4. #14
    Join Date
    Aug 2009
    Location
    Whidbey Island, WA
    Posts
    2,250

    Default

    Well, after some thinking I decided to follow LOML's advice and make the box for the litho as simple as possible so I can replicate it quickly if the need arises (there are already a couple of guys at work interested)

    The box is very simple-- a mahogany top and back held together with a wooden block glued and nailed from/to the top/back from the inside.
    I used a core box bit to create two grooves for the sides of the corian to sit in and then fixed it in place with epoxy. I lined the top and back of the inside with HVAC tape to reflect the light and reduce hotspots from the LEDs.
    The light mechanism is a 5-led battery operated light which operates by pushing on the light. I put a small piece of velcro on the button and then attached a 1/4 dowel with another piece of velcro. The dowel goes about 1/2 way through a hole drilled into the top and into the other side I put a button made of ebony I turned on the lathe.

    I ended up re-flattening the corian and then re-bending it on a tighter curve (coffee can)
    I plan to put a bottom on eventually- but that is really just a nicety as it is not really needed. My next box will be cleaner on the inside as well-- I now know that this prototype works anbd will take my time a bit more next time (the box is functional, but the inside is not as cleanly executed as I'd like- especially with regard to the silver tape and epoxy.
    There's also a youtube video that I uploaded here - HD is available
    http://www.youtube.com/watch?v=4V3EDQAFPGw
    Thanks for looking-
    Lawrence

  5. #15
    Join Date
    Jan 2007
    Location
    South East, Michigan
    Posts
    6,118

    Default

    First Class Project, with an Innovative lighting Solution
    A Big Two thumbs up!!
    Ken


    Ver 1.182 on XL Pro plus Ver 1.164 and 1.175 on Windows 7 Ultimate
    It Never Fails * Till * You Say It Never Fails

  6. #16
    Join Date
    Jul 2010
    Location
    Cleveland, Ohio
    Posts
    21

    Default

    Lawrence
    I thought that the lithophane was fantastic
    when I first seen it and you made it even better
    with the light box you added to it.

    It looks fantastic Great Job
    Looking forward to seeing more of your work.

    Andrew

  7. #17
    Join Date
    Jul 2009
    Location
    Calgary, Alberta, Canada
    Posts
    205

    Default

    Hi Lawrence

    Looks great and the video explaining youre steps was a nice touch.
    Thanks for sharing the look and the knowledge on how you did it.
    Have a great day!
    Be the change you want to see in the world!
    Richard
    Calgary, Alberta, Canada

  8. #18
    Join Date
    Feb 2010
    Location
    Carlisle, Pa
    Posts
    226

    Default

    That is fantastic. The details are something else.

  9. #19
    Join Date
    Mar 2010
    Location
    Northern Utah
    Posts
    903

    Default

    It does look real nice!
    Sometimes I'm just totally underwhelmed!
    Series "A" Craftsman with Carvetight.

  10. #20
    Join Date
    Oct 2009
    Location
    Ohio
    Posts
    1,691

    Default

    Lawrence, now that is one super looking lithopane. I like your box and light. I've been messing around with this last litho of mine and this is what I came up with, sorry the litho isn't bright but I was trying to show the black walnut and all. I carved the groove with the CW, it took one test cut and one tweek and I got it to come out right on the curve to fit. My bracket is also made from black walnut, the light is a puck light that I got from Lowes and I put a rim of black tape on the outside to keep the light from excaping too badly.
    Attached Thumbnails Attached Thumbnails litho pic.png   CW litho.jpg   CW litho rear.jpg  
    CarverJerry

    ver. 1.188 Win 7- 64b with 6 GB ram @ 2.8Ghz and dual 1Tb hard drives. Rock Chuck & Ringneck vacuum system hooked up to a Harbor Freight large vacuum. Center line text, conforming vectors.

Page 2 of 3 FirstFirst 123 LastLast

Posting Permissions

  • You may not post new threads
  • You may not post replies
  • You may not post attachments
  • You may not edit your posts
  •