You can try messing with this...


 Junior Member
You can try messing with this...
ROCKin' with my Dust Collector - Get the mpc here
http://forum.carvewright.com/showthr...ve-it-yourself
 Senior Member
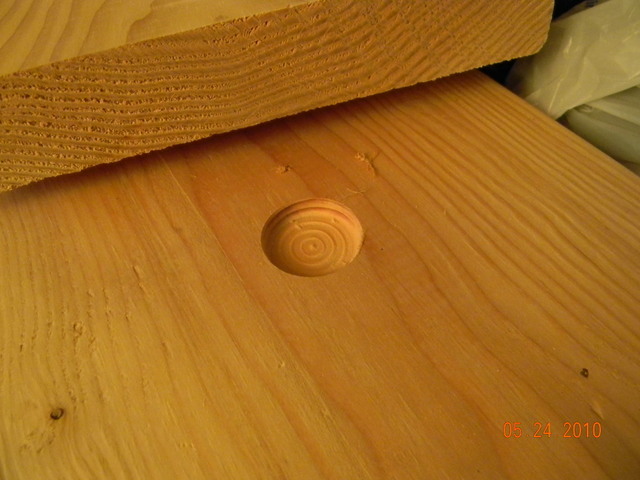
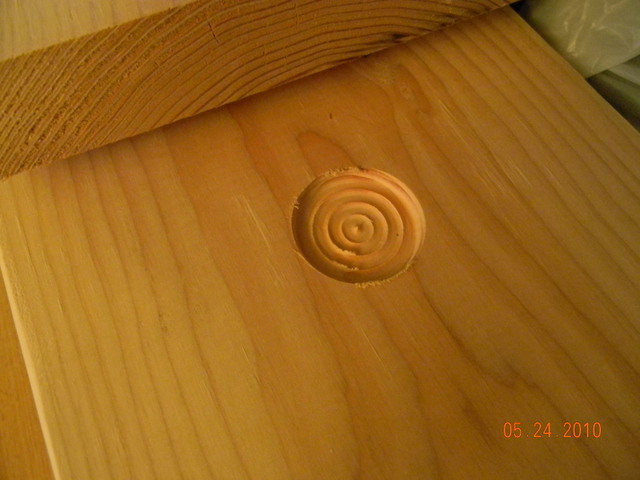
[QUOTE=ND-Hound;128524]I'm trying to help a friend with a restoration project, and can't figure out the software set up for this which looks so simple. I downloaded a tutorial that helped some but not completely.
Here are the photos he sent and my attempt creating it:
You could draw that pattern with the "Wolfie's Gradient Designer" search the forum for the download. It works great for making all kinds of weirdo designs; it downloads the grayscale in a BIT Map format.
Great program for making molding shapes. I think it was Mike G, back in 2007 that first posted it???
Last edited by bjbethke; 05-03-2010 at 10:10 AM.
Using Designer Version 1.187
Donations are always welcomed, thanks send a check to my PO Box 652
BJB
PO Box 652
Yellville,AR 72687-0652
PM me for my e-mail address.
 Senior Member
Use a point cutting roundover bit,such as the one from MLCS PART #6432
WWW.MLCSWOODWORKING.COM iT'S A 1/4" ROUNDOVER BIT (PLUNGE CUTTING) THAT COMES TO A POINT AT THE BOTTOM. PICTURE IS IN THE CATALOG.
LATER dANIEL
1.187 Custom Woodworking for more than 40-years
Junior Member
BJ,
It appears Wolfie has passed on to a greater life. He's not to be found on the internet or our forum. Rest in peace.
Chief
Senior Member
some time ago. you can look at all my post or search them to find it.
 Junior Member
I tried the 1/4 bullnose and for some reason it's not carving what the software shows it should look like.
Her's the mpc and photos
Originally I tried these simple circles with smaller routes to
make the edges more rounded and then planned to sand them
to the final shape. The top pic is the original one and the larger
carving is the mpc attached where I eliminated all but the main
circles. Didn't change much. Do I have a setting incorrect somwhere?
 In Memoriam
I did a test.
Your MPC is OK. I have 2 guesses!
1) Your real board is less than the measurements in Designer, and you selected "Size to Fit" when asked.
2) You are using a bit larger than the 1/4 inch ballnoes.
AskBud
AskBud Downloads =>> CLICK HERE
Lesson added 7/15/2012 Titles begin with "2D-3D Build a Pattern-Part-3"
CW Vacuum Head Project =>> CLICK HERE
AskBud Home Page =>> CLICK HERE <<=PC lessons or CW lessons
More than 1250 AskBud patterns vvv-CLICK BELOW-vvv
http://store.carvewright.com/manufac...ufacturerid=29
Junior Member
Board settings are 9 x 12
actual measurements are 8.75 x 12.25
Would it make a difference if I said not to stay under the rollers?
In Memoriam
Since you are less than both the width & length, each will ask about "resizing".Originally Posted by ND-Hound

Is this a test board, or something you need?
You could make your design board smaller. Width 4" length 6", Do not stay under rollers, do not resize, center on board.
AskBud
AskBud Downloads =>> CLICK HERE
Lesson added 7/15/2012 Titles begin with "2D-3D Build a Pattern-Part-3"
CW Vacuum Head Project =>> CLICK HERE
AskBud Home Page =>> CLICK HERE <<=PC lessons or CW lessons
More than 1250 AskBud patterns vvv-CLICK BELOW-vvv
http://store.carvewright.com/manufac...ufacturerid=29
Junior Member
This is a test board to use as an example for the friend that is making a matching board for a mantle. The real one will be 51" long and 7.25 wide.
I'm using these dimensions to use scrap boards left over from a construction project. Most of my experience is plaques.
 Posting Permissions

 Reply With Quote