Jason is the site down? I tried the link and it would let me enter.
Ike

 Senior Member
Jason is the site down? I tried the link and it would let me enter.
Ike
 Member
I havent been able to get to the site for the last couple weeks now.
Kinda of miss being able to check out site
Member
I just tried the link, and it worked for me?
Ray
 Senior Member
For Me....... here is the entire link http://cncartguild.forumotion.net/sc...r-t259.htm#618
Last edited by LittleRedWoodshop; 10-03-2009 at 11:50 AM.
Senior Member
We were actually discussion using a piece of software to make keychain patterns for use with the CarveWright - but this is how I import scroll saw images as well.... hope this helps.
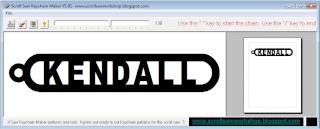
Step One: Download the software
Step Two: Type in the name that you want to cut
Step Three: Because there is no save option in the software - you are going to need to take a screen shot and edit the name out in your image editing software
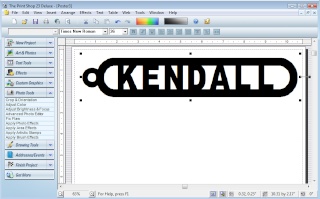
Step Four: Save the image and then import it into Designer
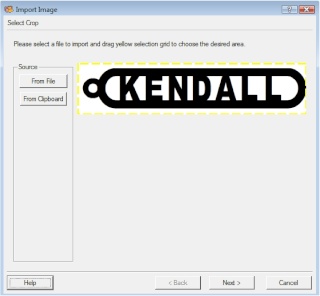
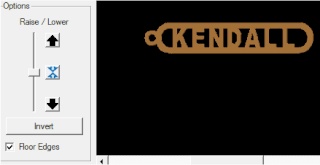
NOTE: as you import the image "Lower" it in the impoter to get rid of the background - just leaving the keychain itself.
Senior Member
Five: Once you have the image saved in Desinger - the rest is kind of an experiment. Some of the images can be placed directly on the board and will cut fine - some need a little fine tuning in the Pattern Editor.
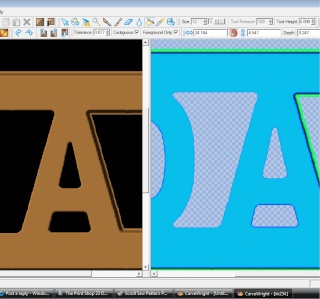
If Designer won't let you cut the image out then double click on it and open it the Pattern Editor. Once you have it open in the Pattern Editor - click on "Filter" - select "Smooth" and set it to 10 - click OK. Now take the "eye dropper" and select the empty background - then select (or delete) the green areas from around your design. (this is making the spaces between the letters just a little larger)
When you finish editing it then select "File" then "Save Pattern to Library"
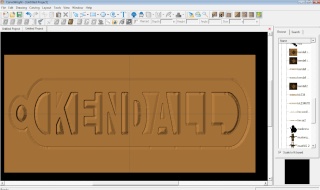
Step Six: Place the images on your board the way you would like it....
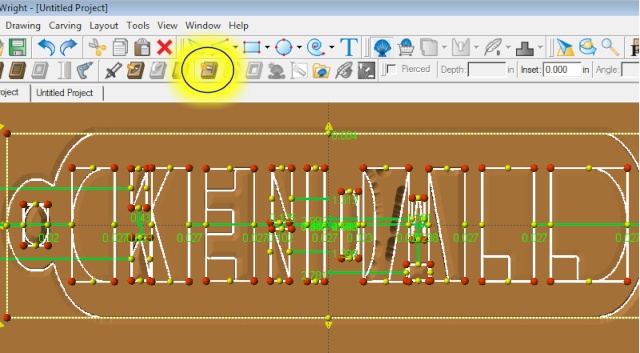
Step Seven: Right click on your image and select "Outline Pattern(s)" - when you have your outline highlighted you will see the "cut out" or "saw" icon lit up (hopefully - if not repeat step 5) if it is lit up then click on it and set up your cut out
NOTE: it is very impotant that you delete the original image from your Pattern.... it will make some funny cuts if you don't.
Senior Member
Hope this helps, Jason
Senior Member
Very cool Jason! This forum is so great we have so many talented members that I appreciate that they share with us! Thank you Jason and of course Micheal and Al and the list goes on and on!
Ike
PS the new link worked great!
Member
Originally Posted by LittleRedWoodshop

Not so much the link...Ive visited the site numerous times and had it saved as a favorite and used the favorite numerous times....wasnt until the last couple weeks its not connecting to that site for me. Cant figure it out just yet. Not receiving any errors just wont connect to it.
Senior Member
Like you can't get to it at all - or just the link that you ahve saved isn't working......
 Posting Permissions

 Reply With Quote
")